Creating Kindle books with Kindle Create
If you publish Kindle books on Amazon’s Kindle Direct Publishing (KDP) platform, you may have seen that Amazon’s recommended method to format your e-books is to use Kindle Create. The software is free and easy to use, especially for novels written in Word, but it has some foibles. Here are my tips for using it.
Kindle Create imports your DOCX file and converts it to a Kindle Create Book (KCB) file for formatting. Once the e-book’s structure is built, the software exports a Kindle Package Format (KPF) bundle, and it is this file which is uploaded to your KDP Bookshelf. You’ll need to upload your cover image separately.
KDP then converts the KPF to an AZW3 file so it can be viewed on Kindle devices. A previewer is available. If mistakes are spotted it’s a very simple process to fix them in Kindle Create and then export a new KPF file. This can be done even after the e-book is published. Amazon will make the latest file available for sale.
This blog is not a guide for every step of the publishing process. I’m going to assume you’re writing in Word and are familiar with the KDP Bookshelf. Kindle Create is not word-processing software, so only use it once your final draft is ready. (If you want to buy writing software which also formats e-books, consider Atticus.)
Kindle books are designed to be customizable by the reader, e.g. font face and size, so it isn’t necessary to format an e-book with the same artistic precision that you would apply to a printed book. That said, there are some things you should do when preparing your Word document for conversion in Kindle Create.
Kindle does not support every language. If your text includes non-Western European accented characters, they might not display correctly. For English e-books it is safest to only use Unicode’s Basic Latin and Latin-1 Supplement standards. Words with, for example, Romanian or Turkish glyphs probably won’t work.
If you have words with non-standard accented letters, e.g. in dialogue or foreign names, replace the letters with normal English equivalents. You can do this in Kindle Create, but I’d encourage you to have a version of your Word manuscript specifically saved for e-book conversion, and to make the changes therein.
Make sure your text is justified and the paragraphs are correctly indented (no more than 0.5cm or 0.25in). Use the Paragraph settings or ruler tool for first-line indents, never the Tab key. Separate chapters with page breaks. It is not necessary to apply heading styles, nor should you build a table of contents in Word.
Remove images from the Word file before importing. Images should be inserted directly into Kindle Create. You don’t need anything other than the text of the story either; copyright information and other details can be added to template pages in Kindle Create. That’s not a strict rule though; you can add custom pages.
There should be no space between paragraphs. Widow and orphan controls should be off. Page numbers must not be included. The font colour should be set to automatic. There should be no soft / discretionary / optional hyphens or non-breaking hyphens. Normal hyphens, dashes and non-breaking spaces are fine.
Don’t include drop-capitals in your Word file because these should be added in Kindle Create. True small capitals must be excluded because they are special glyphs rather than regular letters, and they won’t be recognised in Kindle Create. The effect can be faked by using regular capitals at a smaller font size.
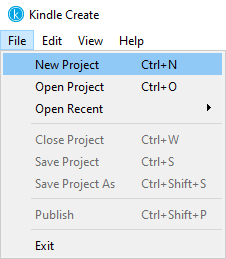
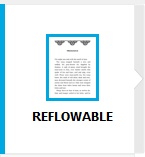
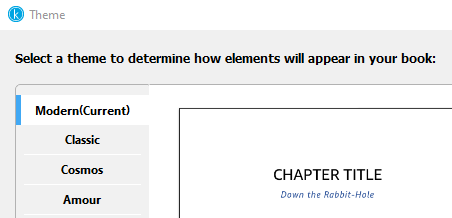
Once your Word document is in good shape, you can import it into Kindle Create by selecting File > New Project. Select Reflowable and then click Choose File. The process will take a while because the software needs to convert the text and apply some formatting. You will also need to pick a layout theme.
Once the text has been successfully imported, you’ll see the main Kindle Create workspace. The left-hand side shows the Front Matter, Body and Back Matter sections (the book’s contents). The manuscript occupies the middle space. Formatting tools are called Text Properties and sit in the right-hand panel.
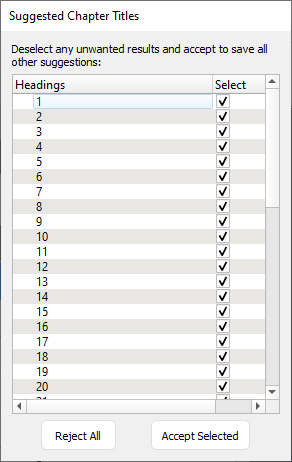
Kindle Create will try to spot your chapters and display them in the Body panel. It is not a problem if this does not happen because you can apply a Title Element to each chapter to identify it correctly. If chapters have been identified in the Suggested Chapter Titles window, you can accept or reject them at this stage.
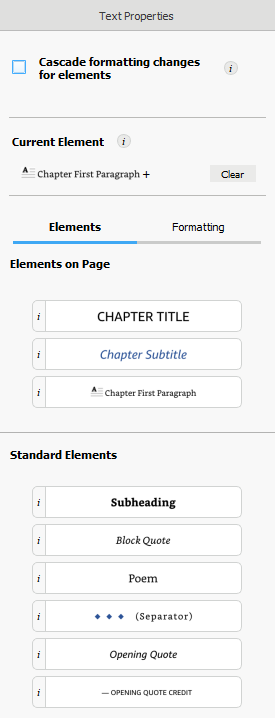
I suggest you concentrate on the Body content before adding other details such as copyright information. The formatting process is simple. All you have to do is scroll through your manuscript, click the chapter number or name, and then pick the CHAPTER TITLE element in the Text Properties panel.
However, there is one key detail to mention. The option to Cascade formatting changes for elements is there to ensure the design is consistent throughout the book, especially if the style has been modified. I, however, always switch it off because it removes italicised text and makes other unwanted adjustments.
When you apply the CHAPTER TITLE element, you’ll notice that a style is applied to your chapter headings. A yellow dot in the Body section indicates that you must apply a style element to that part to ensure the page will appear in the Table of Contents. You can alter the default chapter title settings if you wish.
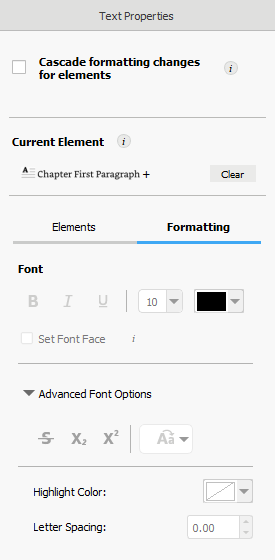
The Text Properties panel is comprised of two main parts. There is the Elements section, which you use to apply a style to an element, e.g. a subheading or block quote. There is also the Formatting section, which allows you to make adjustments to the selected element. Several Standard Elements are available.
Once you’ve applied the CHAPTER TITLE element throughout the book – this is the equivalent of applying a style in Word – the next task is to tell Kindle Create to format the first paragraph of each chapter. Click somewhere in the first paragraph of each chapter and choose the Chapter First Paragraph element.
This is where you might encounter the problem I mentioned a moment ago. The Chapter First Paragraph element strips out any italicised text and also (invisibly) removes the justified alignment. Justification and italics have to be reapplied, but if you have the Cascade option selected, they will be scrubbed again.
The other problem with Chapter First Paragraph is that it uses a default line spacing of 1.2. The rest of the chapter will probably be set at 1.25. The way I fix this is to scroll to the end of the chapter, then click and drag upwards until I have all the text of that chapter (including the first paragraph) selected.
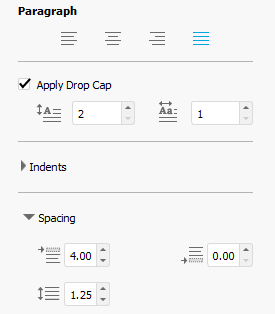
I then ensure that justification is switched on (the alignment symbol should be blue) and adjust the line spacing to 1.25. I change the font size to 10 because this seems to be a good starting point when viewed on a Kindle. I adjust the drop capital because I prefer a two-line drop to the default three-line setting.
If you have missed a page break, you can create one simply by right-clicking in the appropriate location. You will need to apply the chapter heading style and first paragraph style as described above. You can add images in the same way. Make sure they are of a high resolution to avoid blurriness in the Kindle book.
If your image is large and needs a page of its own, click the plus sign in the Body section to create a blank page. Insert the image by right-clicking. If you are using an image that fits the width of the page, make sure it is 1800 pixels or more wide. Once the Body formatting is complete, start work on the Front Matter.
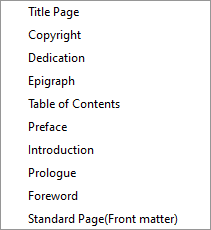
Various templates are available for the Front Matter section. Click the plus sign for the options. Be aware that the templates have pre-set styles and cannot be modified. If you want to style something in a different way or add an image, use the Standard Page option. Pages can be reordered by clicking and dragging.
The Back Matter section can be built in exactly the same way. I, however, don’t use this. There’s usually very little to add to the back of a book, for example an author’s note or acknowledgements section. I tend to add pages of this nature to the Body section and treat them as extra chapters for navigation purposes.
You can add hyperlinks to your Kindle book by highlighting the text, right-clicking and selecting Insert Hyperlink. If you want to create links to your Amazon products, you should pay for a dynamic URL so the reader is taken to the correct Amazon store. Alternatively, it is simpler to link to your author website.
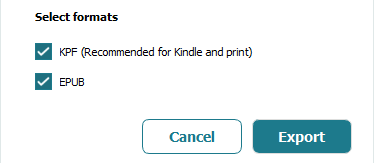
There is one item which you must add before exporting the KPF file. This is the Table of Contents. This sits in the Front Matter section and it will recognise all of the yellow-dotted entries in the Front Matter, Body and Back Matter sections. Save and preview the file. When ready to export, click Export.
The icon for the exported KPF file looks like a cardboard box. This is the file you will upload to your KDP Bookshelf. You will need to upload your cover image as well. KDP will then convert your book and ask you to preview it. When everything looks right, you can complete the steps and publish your Kindle book.
Kindle Create has been updated to include an EPUB export option. This is a significant and useful upgrade to the software, which formerly only produced KPF files for use on Amazon’s KDP Bookshelf. This means you can use Kindle Create to build EPUBs for use on other platforms if you are not exclusive to Amazon.
I should mention that Kindle Create includes a tool for creating a PDF of your book for the paperback edition. Do not use this. It’s very basic and has limited options. Do your formatting for print in Word or other desktop publishing software, saving a separate version of your manuscript for each book edition.
There are fancier ways to create e-books, but this application is reliable and very easy to use. The software is designed by Amazon for integration with Kindle Direct Publishing, so you know it’s going to work. It takes very little time to build a KPF file from a well-prepared Word document in Kindle Create. Give it a try.


